AWS IoT
AWS IoT 概述
AWS(Amazon Web Service)是目前市場上廣泛使用的雲平臺,而 AWS IoT(物聯網)支援 MQTT 協議。根據市場趨勢,從 EasyBuilder Pro V6.00.01 開始,威視科技已經採用了 AWS IoT 服務,並將其與之前釋出的 MQTT 功能整合在一起。除了將 AWS IoT 用作釋出-訂閱模式中的代理伺服器外,使用者還可以建立 AWS IoT 提供的 Thing 和 Shadow,以充分利用 MQTT。
本手冊將引導您完成託管 MQTT 伺服器、配置 EasyBuilder Pro 和建立 Thing 的步驟。
託管 MQTT 伺服器
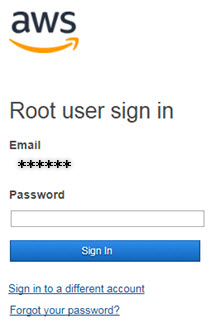
AWS 是一個雲平臺,因此所有設定都在網頁上進行配置,請在託管 MQTT 伺服器之前在 Amazon 網站上註冊。
- 訪問 Amazon Web Service 網站:https://aws.amazon.com
- 註冊賬號(左側:個人賬號,右側:企業賬號)
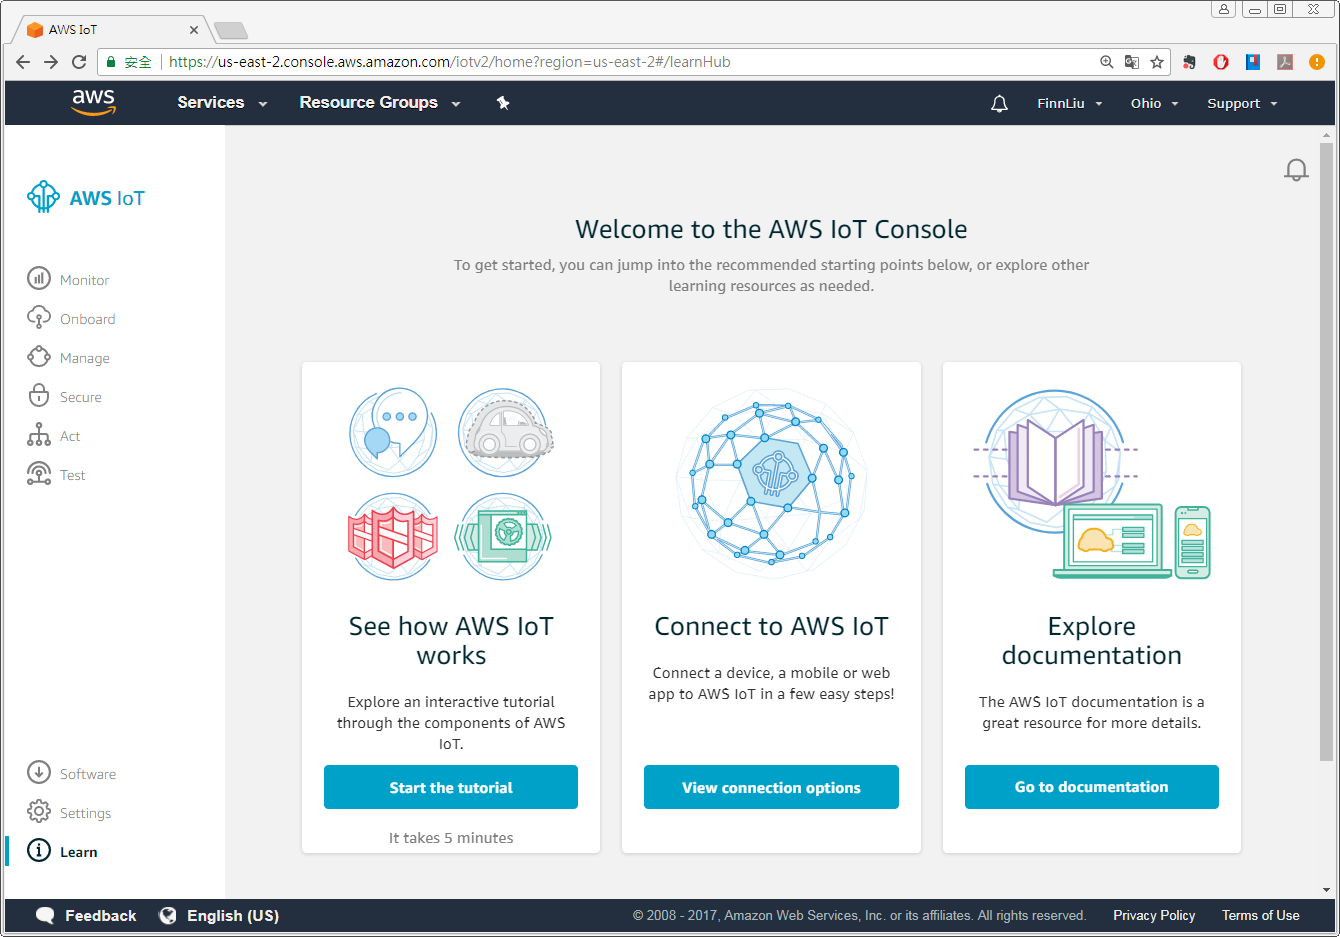
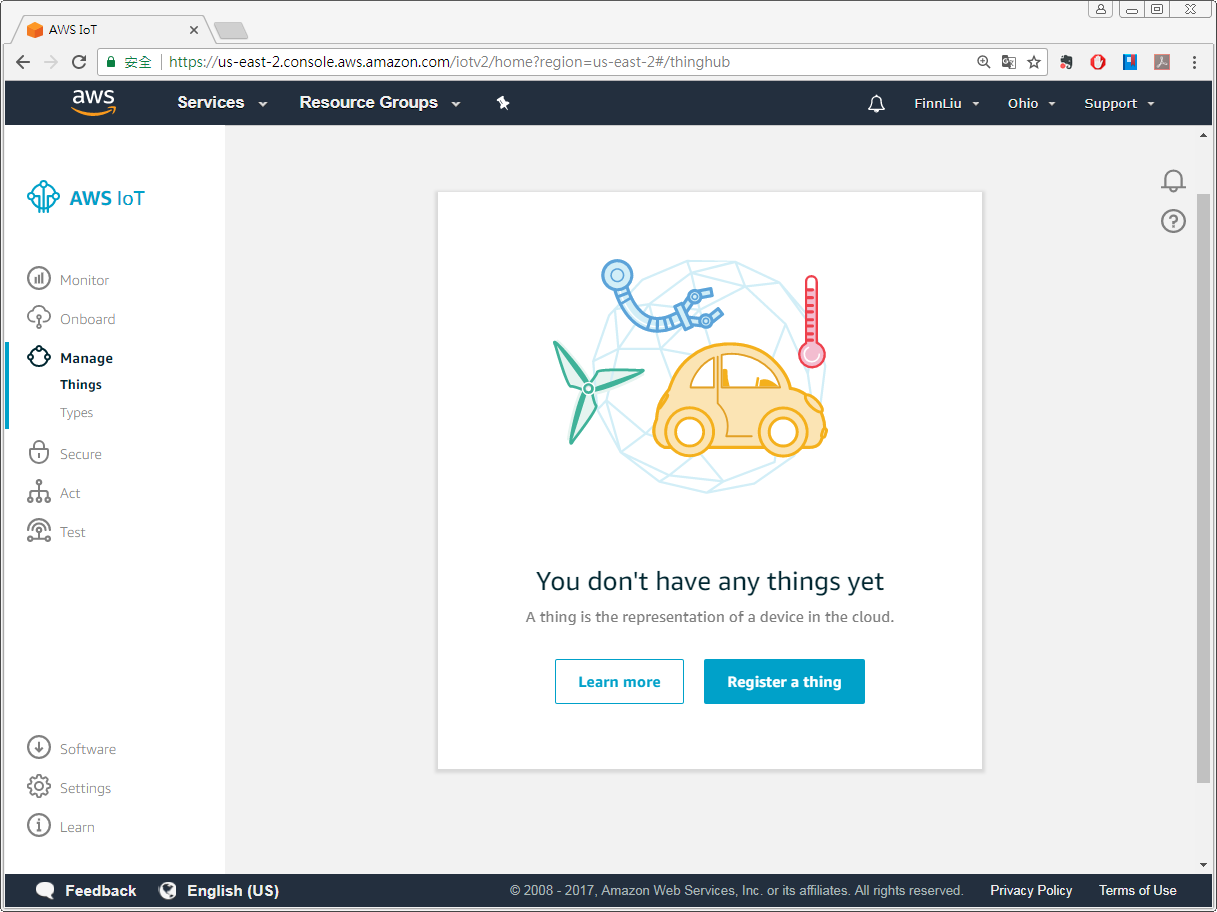
- 登入後,瀏覽 AWS IoT。
- 點選 [開始] 進入使用者介面。
- 建立策略和證書。
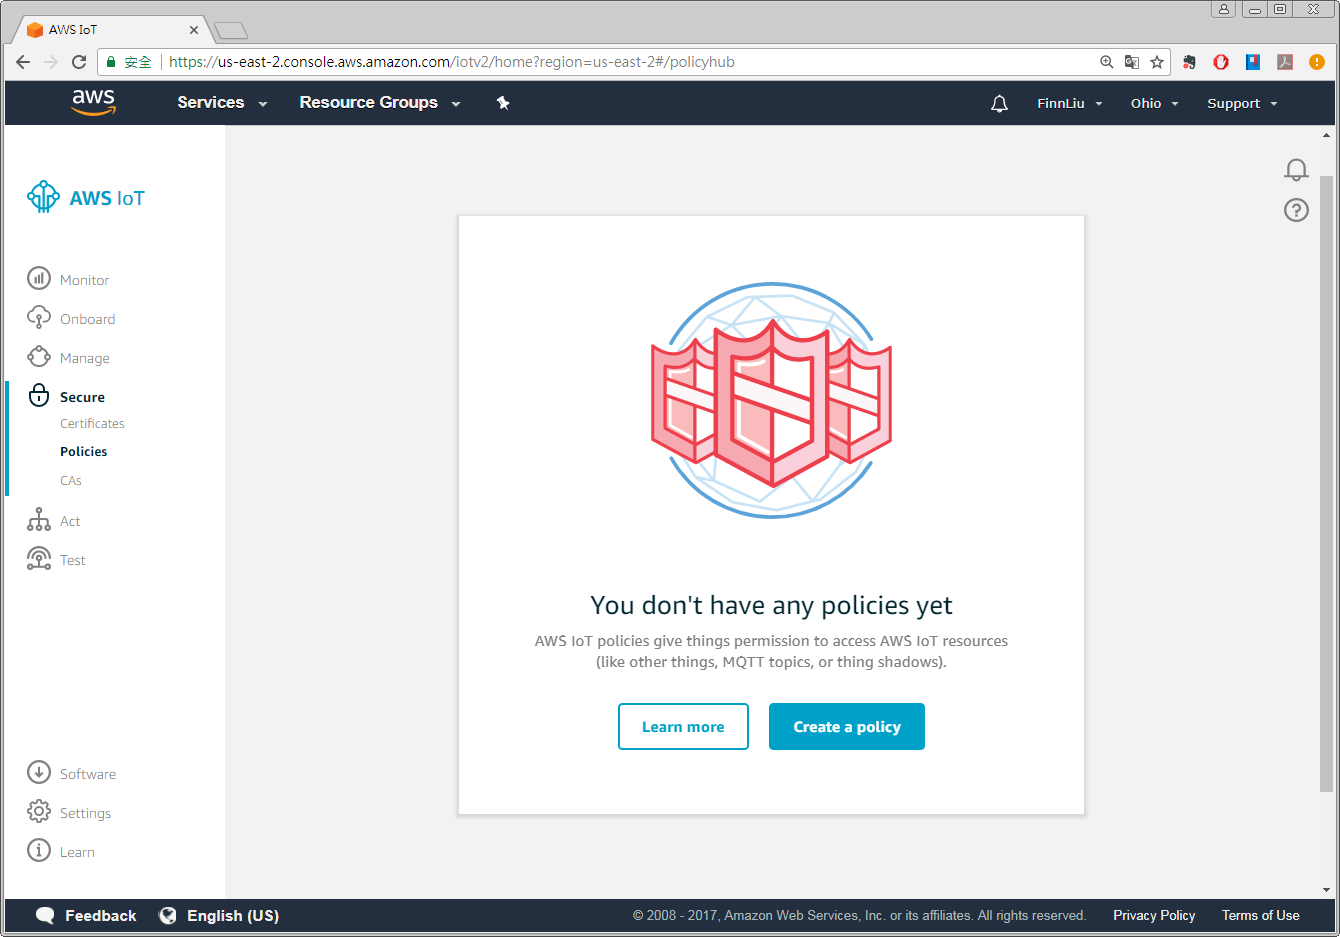
- 點選 [安全] » [策略],然後點選 [建立策略]。
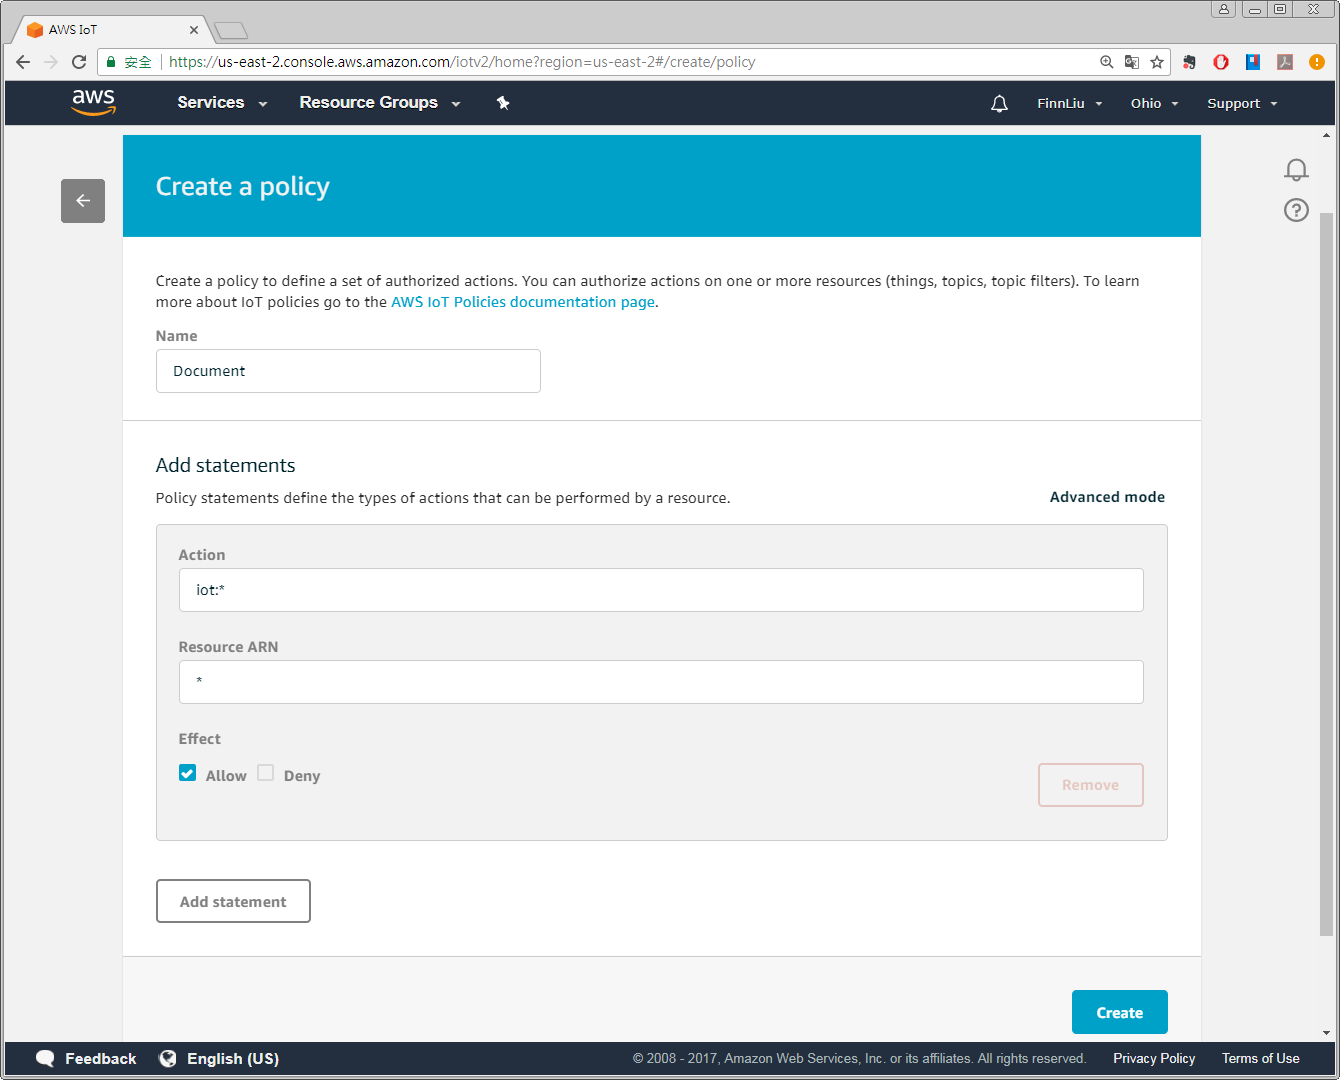
- 此頁面用於定義資源可以執行的操作。您可以使用下面的截圖中的設定,也可以自行設定。完成後,點選 [建立]。
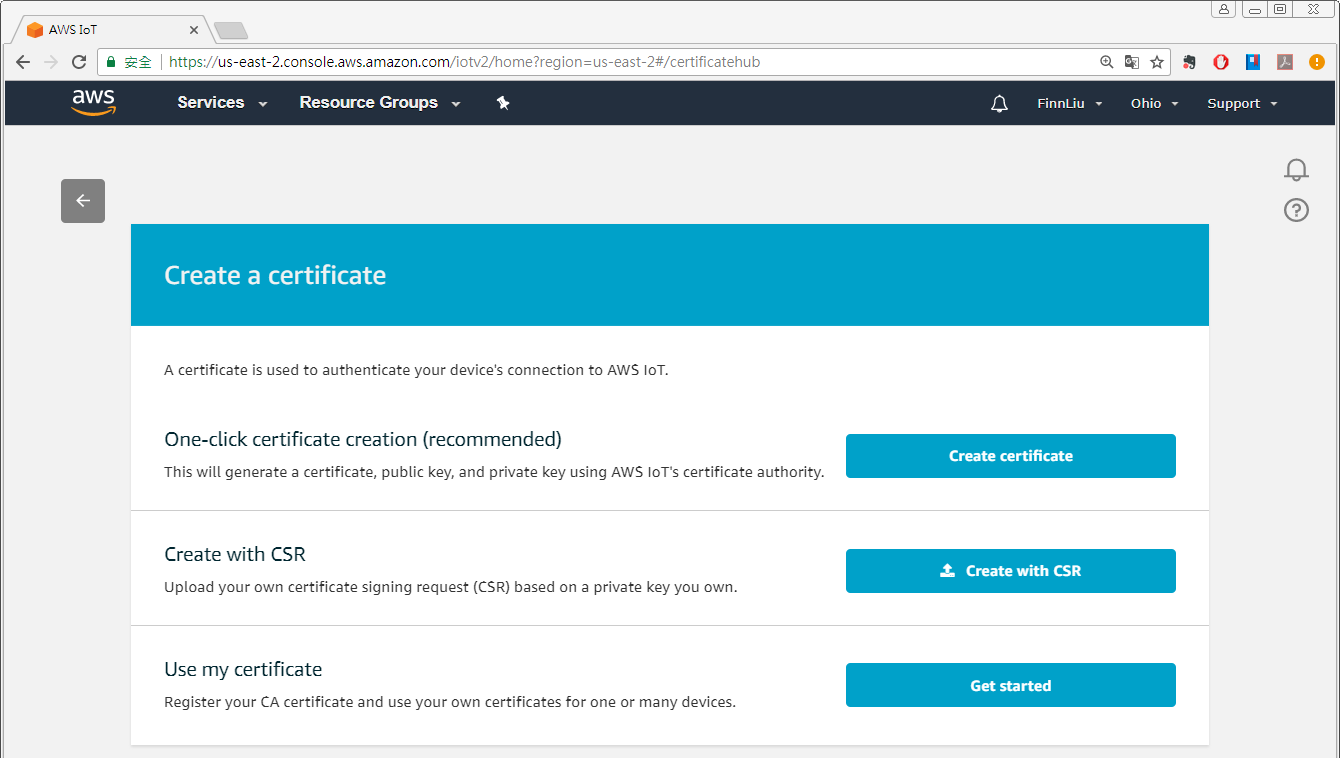
- 點選 [安全] » [證書],然後點選 [建立證書]。
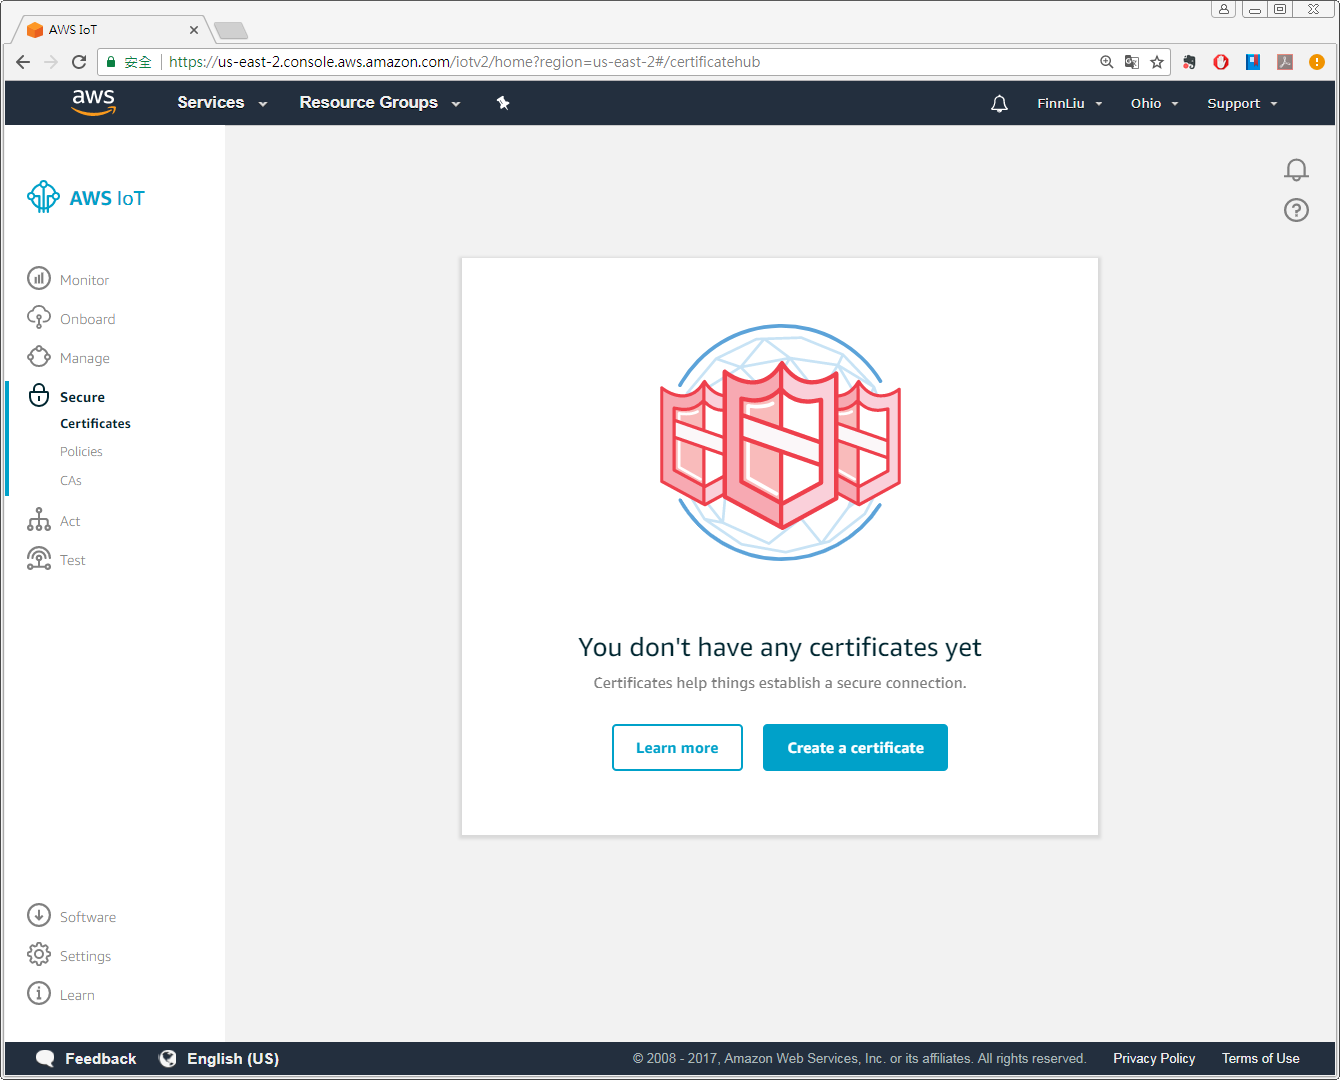
- 在 [一鍵建立證書] 附近點選 [建立證書]。
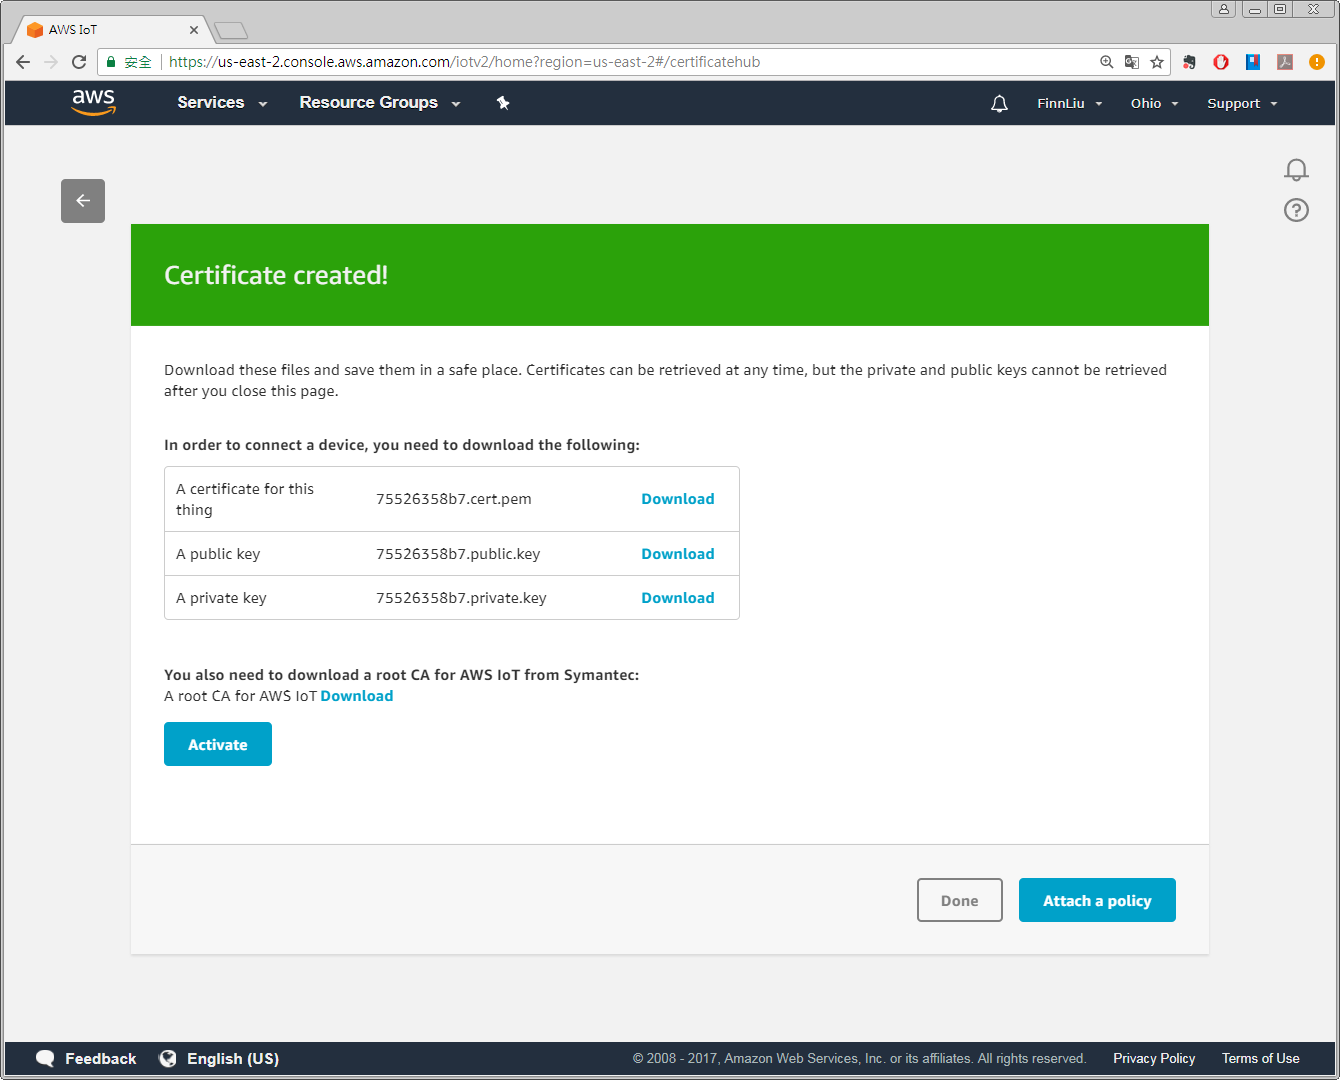
- 在儲存四個下載檔案後,點選 [啟用] » [附加策略]。
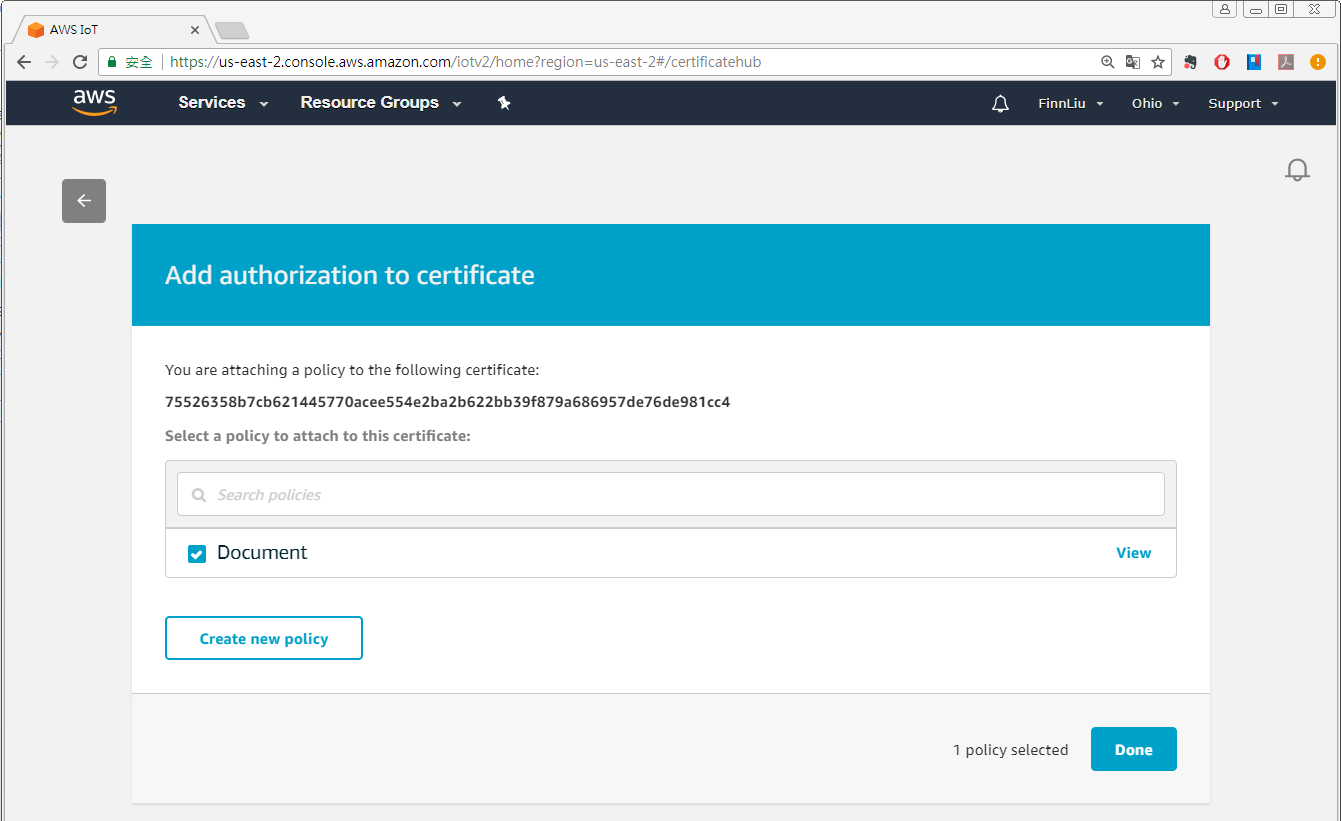
- 選擇前面步驟中建立的策略,然後點選 [完成]。
- 當出現以下提示框時,安全設定已成功完成。

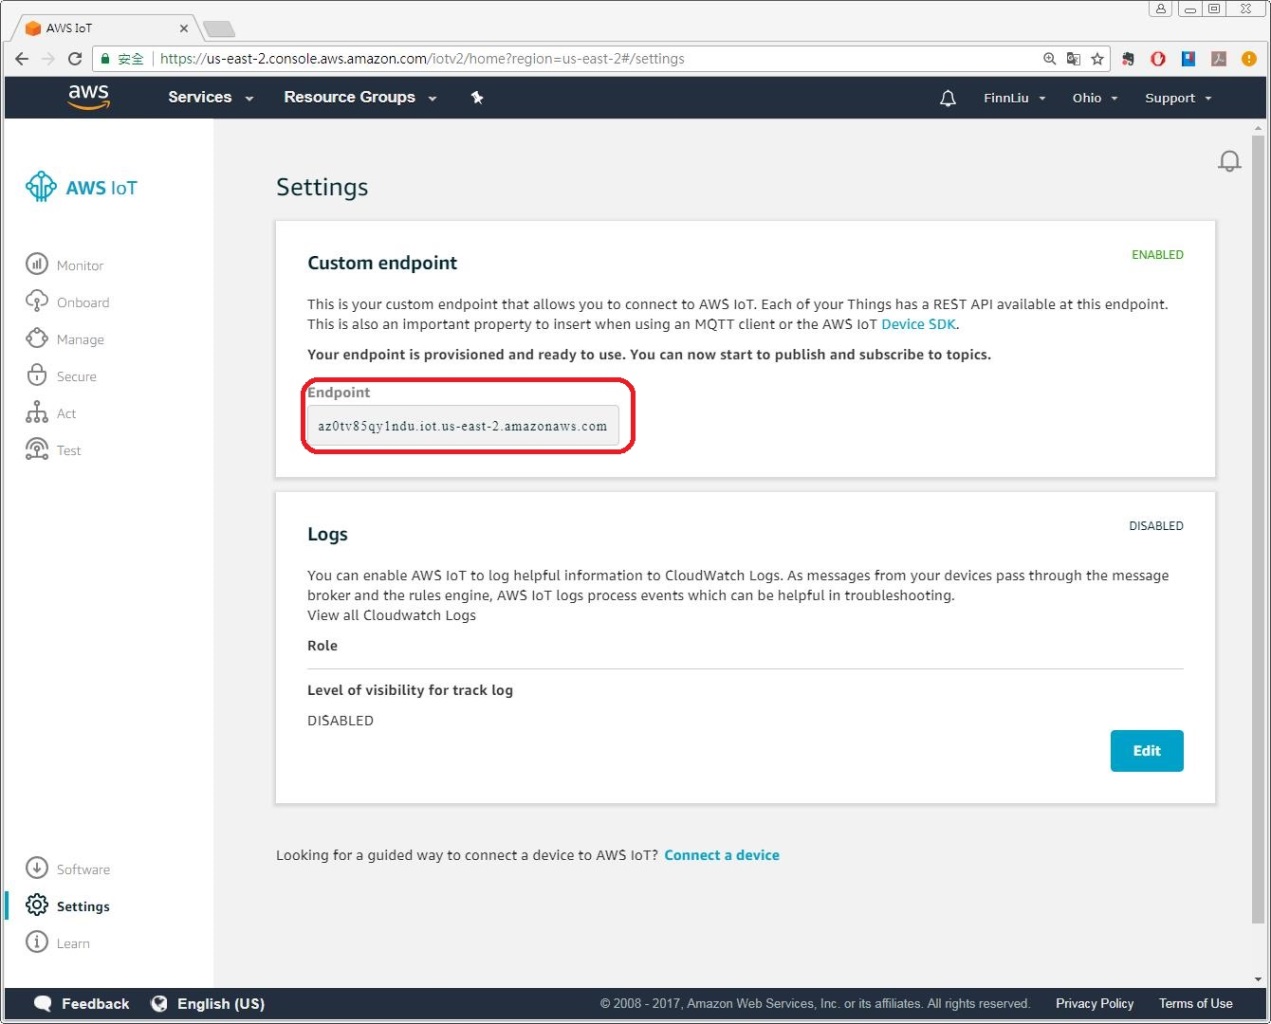
- 點選 [設定],紅框標記的 URL 是 AWS IoT 伺服器的域名,在 EasyBuilder Pro 中設定 MQTT 時會用到,請記住它。
EasyBuilder Pro 設定
託管 MQTT 伺服器後,啟動 EasyBuilder Pro。
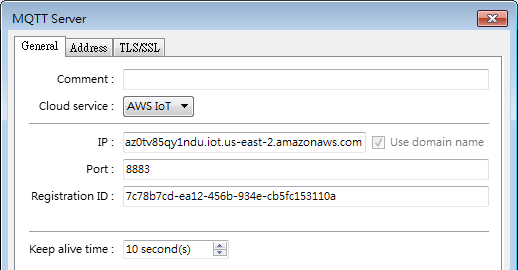
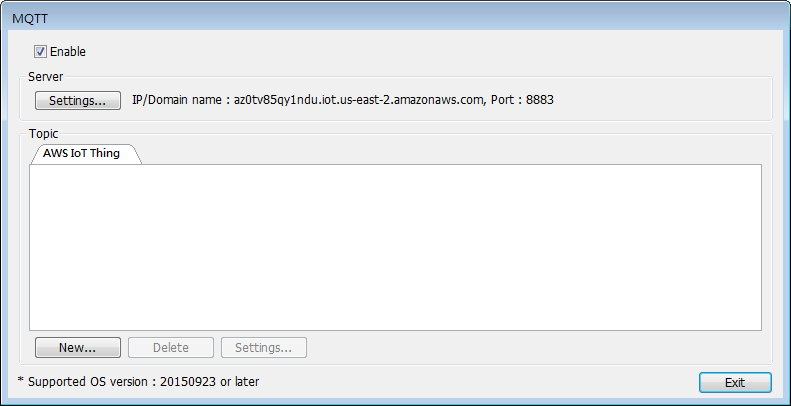
點選 [物件] » [IIoT] » [MQTT] 開啟 MQTT 設定視窗。
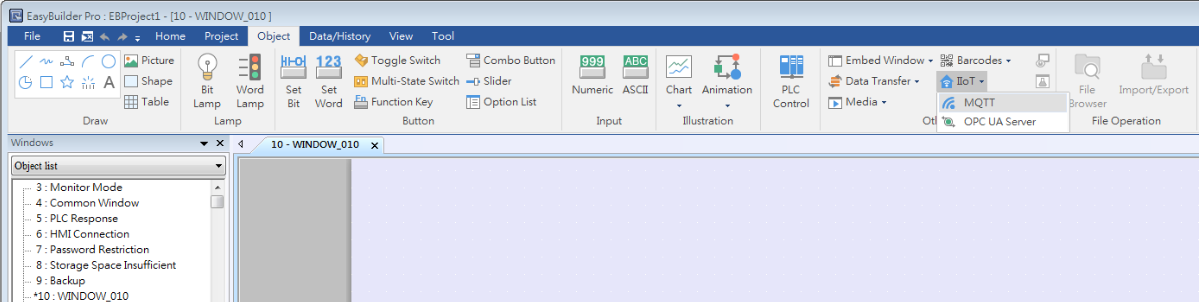
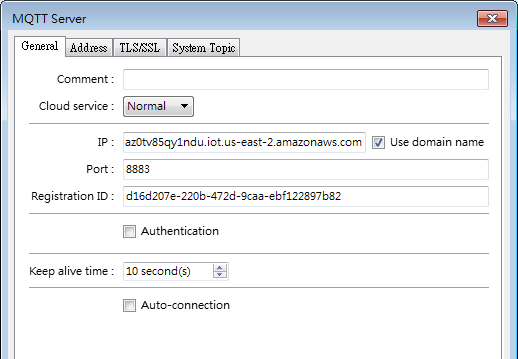
在常規選項卡中,選擇 [普通] 作為雲服務以使用釋出-訂閱模式,或選擇 [AWS IoT] 以使用 Thing 模式,其餘內容將在後面介紹。使用第 2 章中獲取的域名作為 URL,並使用埠 8883。
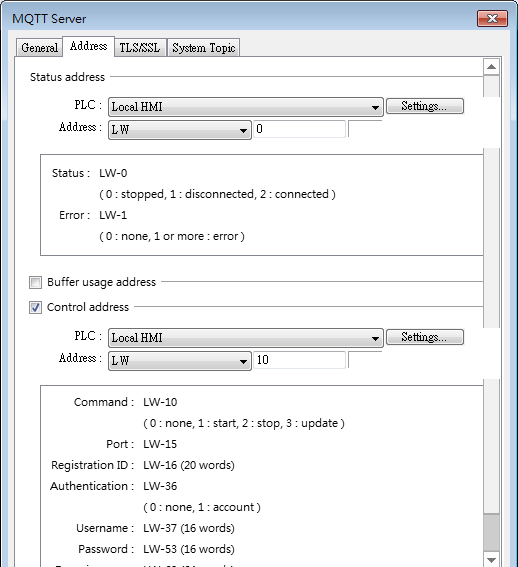
在地址選項卡中配置地址。
在 TLS/SSL 選項卡中,匯入建立證書時生成的檔案。
>伺服器驗證,CA 證書:匯入 .pem 檔案。
客戶端驗證,證書:匯入 .crt 檔案(certificate.pem.crt)。
客戶端驗證,私鑰:匯入 .key 檔案(private.pem.key)。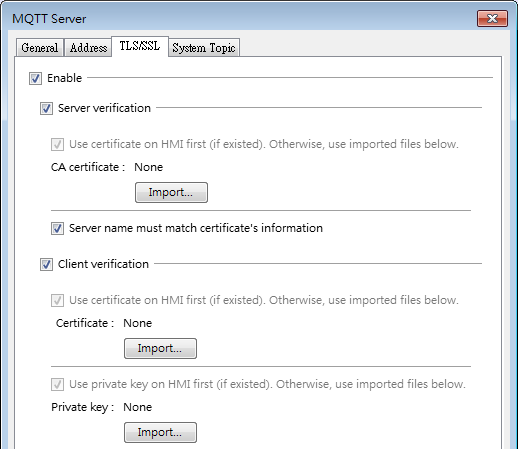
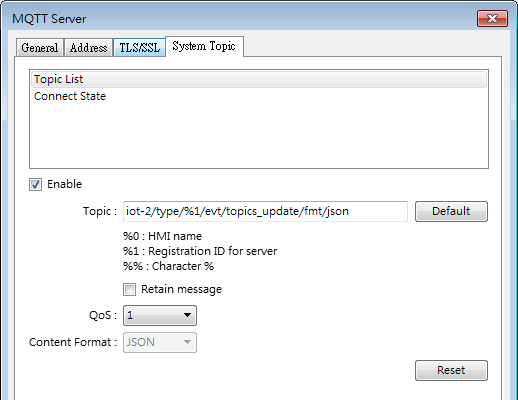
系統主題包括主題列表和連線狀態,HMI 連線到伺服器後會自動傳送。
使用 AWS IoT 作為 MQTT 伺服器的限制:
僅支援 QoS 0 和 QoS 1。
不支援保留訊息。
最大層數為 8。
有關釋出/訂閱設定的更多資訊,請參閱 EasyBuilder Pro 使用者手冊。
Thing 和 Shadow
透過 AWS IoT,釋出者->代理伺服器->訂閱者不再是 MQTT 上訪問資料的唯一路徑。透過引入 Thing Shadow 服務,連線到 AWS IoT 的 Thing(裝置、應用程式等)可以與雲應用程式和其他裝置進行互動。每個連線到 AWS IoT 的 Thing 都可以維護一個 Shadow。無論 Thing 是否連線到網際網路,都可以使用 Shadow 透過 MQTT 獲取/設定 Thing 的狀態。
本章解釋了 AWS IoT 和 EasyBuilder Pro 的配置。
AWS IoT
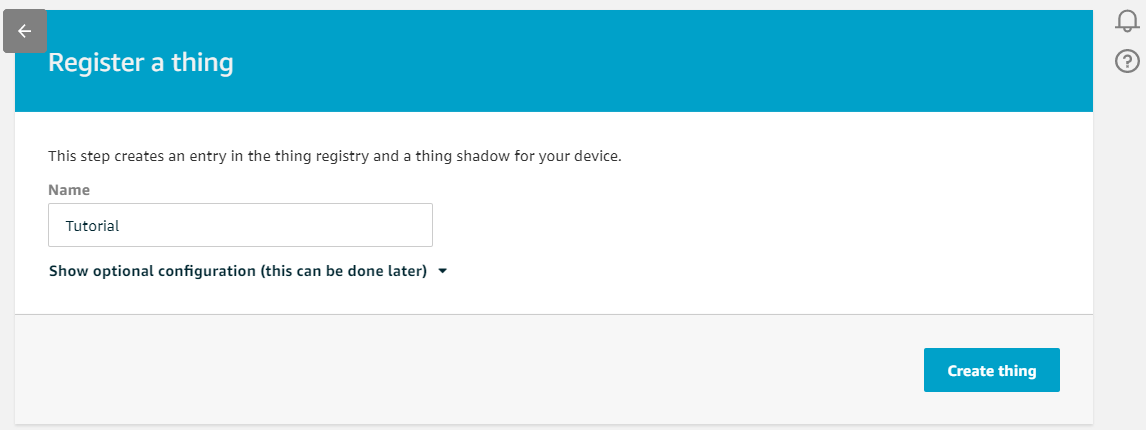
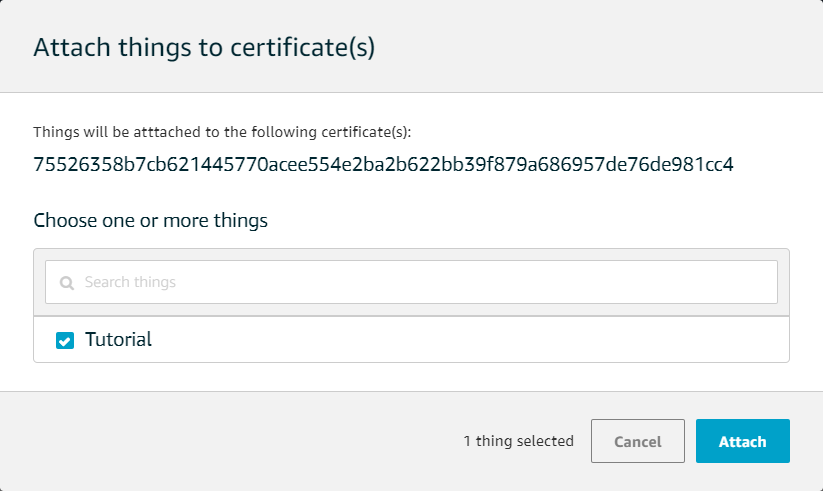
點選 [管理] » [Things] » [註冊 Thing]。
輸入 Thing 的名稱。
選擇 Thing 附加的證書。
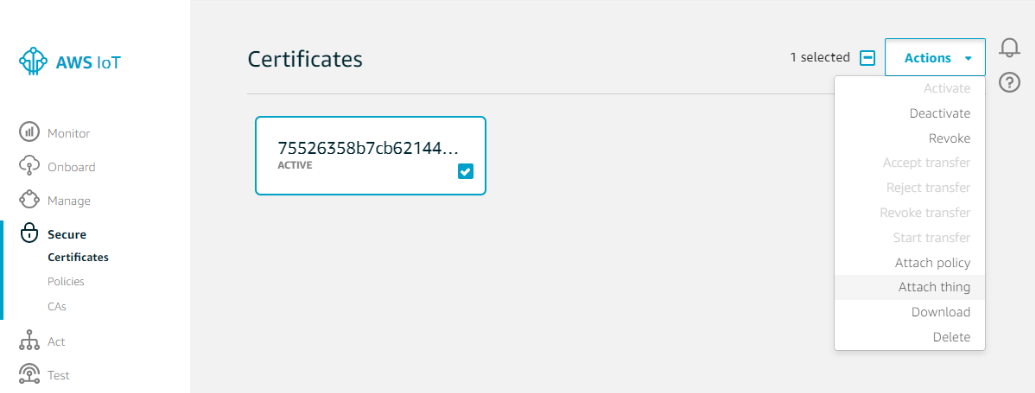
點選 [附加] 完成。
EasyBuilder Pro
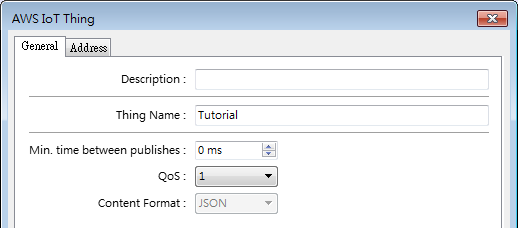
在 MQTT 伺服器設定視窗中選擇 AWS IoT 作為雲服務,並按照本手冊第 3 章中的設定進行操作。
點選新建以新增裝置。
輸入 Thing 名稱並設定釋出之間的最小時間間隔。僅支援 QoS 0 和 1。
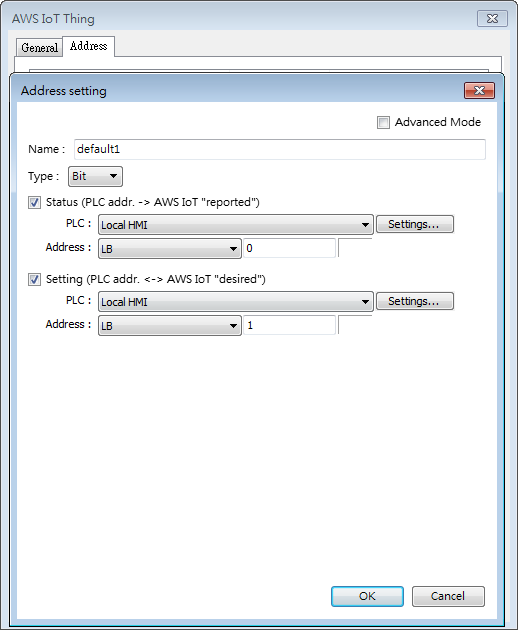
在地址選項卡中設定報告狀態(LB-0)/期望設定(LB-1)的地址。->、<-> 表示資料傳輸的方向。
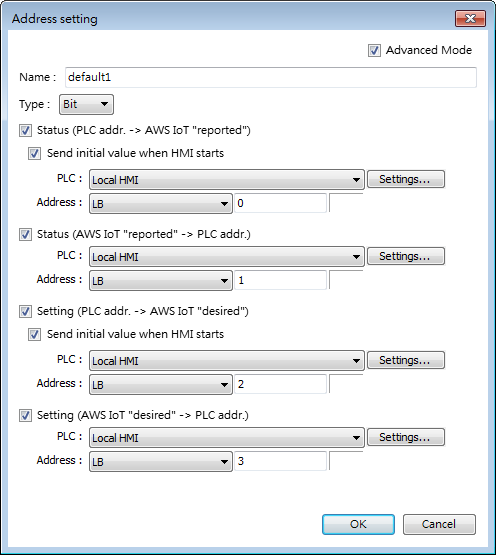
在高階模式設定對話方塊中,狀態(已報告)和設定(期望)可以使用不同的地址,並且資料在 AWS IoT/裝置之間傳輸。
參考資料
EasyBuilder Pro 使用者手冊第 42 章 IIoT
AWS IoT 平臺的工作原理:https://aws.amazon.com/tw/iot-platform/how-it-works/