Add an HMI to a Domain
Activate an HMI
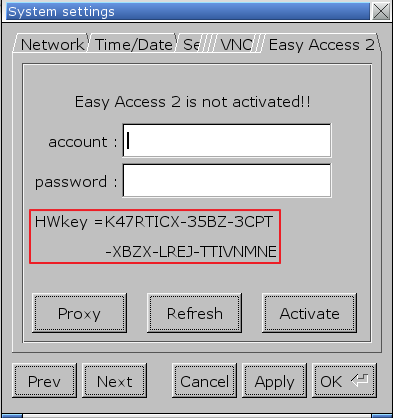
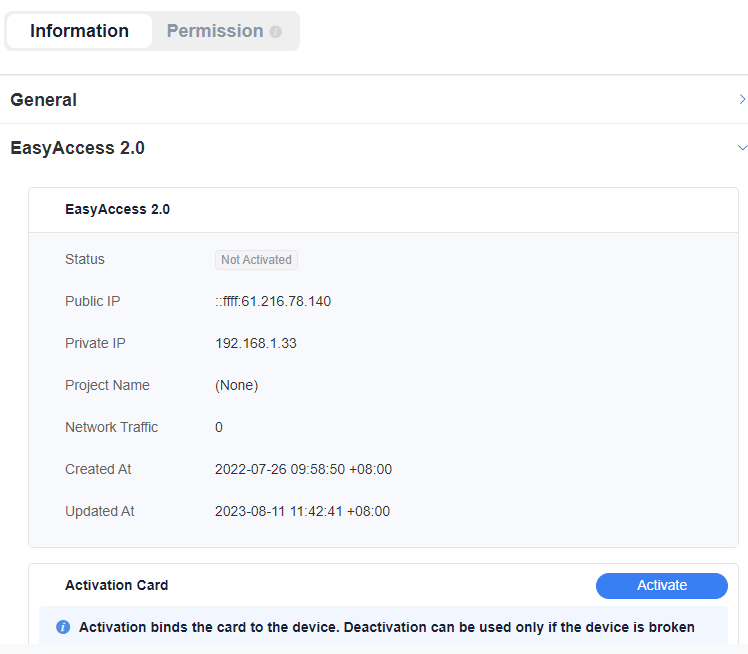
The HMI must have been activated in order to be connected using EasyAccess 2.0. Check its activation status on HMI in the [EasyAccess 2] tab of the [System settings] page.
The HMI can be activated by one of the following means:
- Self-serve activation with activation card on Weincloud web page
- Self-serve activation with activation card on PC Activator
- Activation by Weintek’s authorized dealer
- Alternatively, new user could test out EasyAccess 2.0 by getting trial activation.
Note:
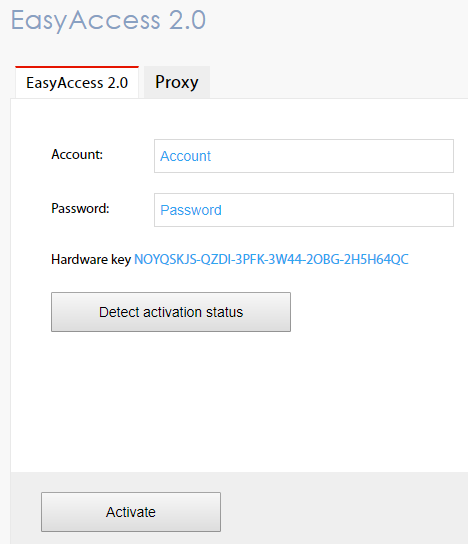
In either case, HMI’s Hardware Key (HWKey) will be required. Locate it in the [EasyAccess 2] tab of system settings or system register LW-11210.
Please note that the account and password on this page are for dealer activation purposes only and are not intended for general user access.
Activation status and Hardware key
With an Activation Card on the Web
If you have an activation card, you may activate the HMI with the Activation Codes printed on the card through the domain management system.
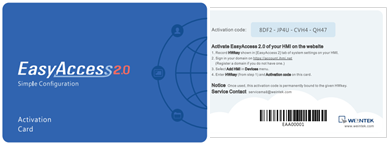
Activation Card
- Visit the domain management system and login to your Domain with your credential. Create a new domain if you do not have one yet.
For the Global server, the URL is https://www.weincloud.net
For the China server, the URL is https://www.weincloud.net.cn - In [Management] tab » [Device Management] » [Add HMI], choose the Action type [Using activation card], and then enter the Hardware key and your Activation code.
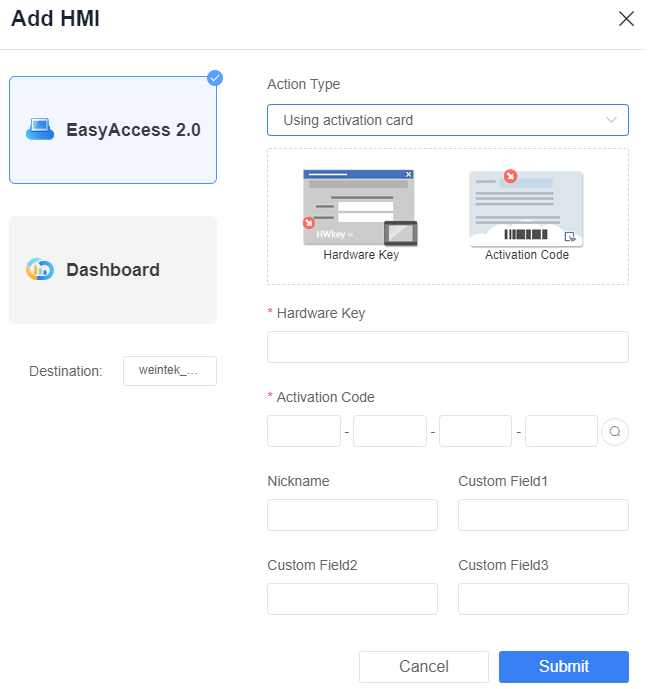
Activation by activation code
Checking Activation Card Information
You can check the activation card information by entering the activation code and serial number correctly using the following methods.
On the Directory page, click the button
 to add HMI.
Choose
Using activation cardas the EasyAccess 2.0 activation method.Click the button

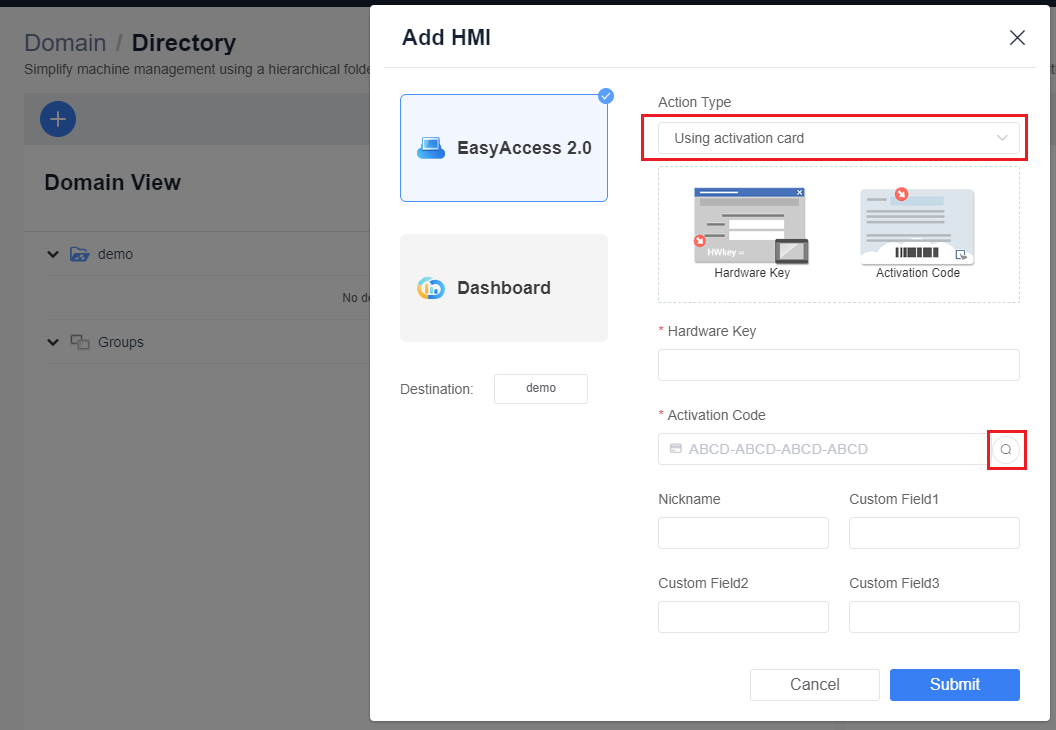
Enter the activation code and serial number, then click
Check.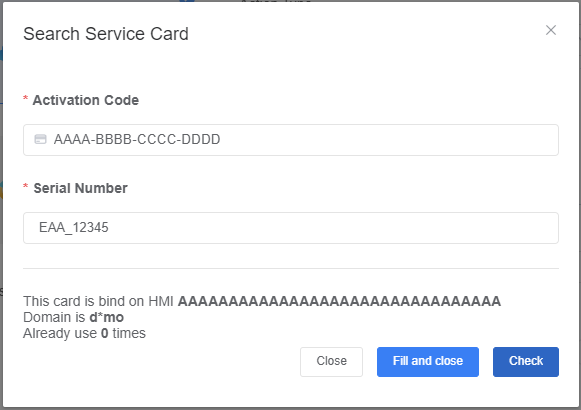
With an Activation Card on PC Activator
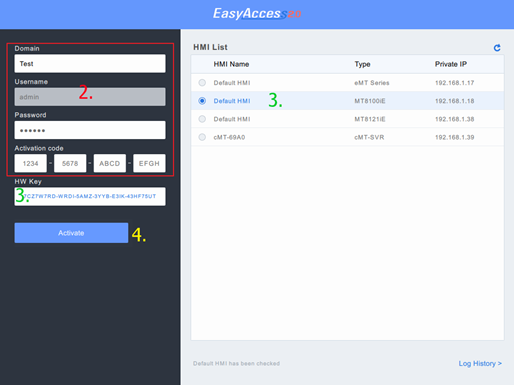
Alternatively, use the helper application “PC Activator” to facilitate activation process.
- Run PC Activator.
- Enter Domain Admin’s credential and Activation code.
- From the HMI list, select the one to be activated. The HW key will be loaded to the display field.
- Depending on the HMI’s current activation status, the button below will show “Activate” or “Already activated.
- Click on the “Activate” button to complete activation.
Note: Support for PC activator varies among different model and OS versions. Please review PC Activator for information on PC Activator
PC Activator
By Hardware key through dealer
Please provide the Hardware key to your dealer for assistance.
Trial Activation
A one-time, 30 days free trial activation option is available for each HMI.
- Visit the domain management system and login to your Domain with your credential.
If using the Global server, the URL is https://www.weincloud.net
If using the China server, the URL is https://www.weincloud.net.cn - In [Management] tab » [Device Management] » [Add HMI], choose the Action type [30 days free trial], and then enter the Hardware key.
Activate Trial HMI
When the trail activation of a HMI expires, you may activate the HMI with activation code.
Please login to you domain, go to [Directory], select trial HMI and activate it under EasyAccess 2.0.
Web (cMT-Series)
cMT-Series can also be activated from web browser, or detect activation status when HMI had been reset.
If some connection problems occur such like "EasyAccess 2.0 connect failed, please make sure network and proxy setting is correct, then try again later. If still get this message, please contact EasyAccess 2.0 webmaster."

Please help check the following settings is correct or not for network trouble shooting.
- [Date/Time] settings: Make sure date/time is correct, you can simply do [Sync with host.].
- [Network] settings: Make sure your gateway and DNS settings are correct.
- [EasyAccess 2.0] => [Proxy] settings: If you use proxy, make sure the setting is correct.
Add an HMI to a Domain by using Session ID/Password
When an activated HMI does not currently belong to any domain, once it goes online, it will obtain a set of Session ID/Password, which can be used to add the HMI to a domain.
How to find Session ID/Password?
Session ID/Password are generated uniquely for the HMI by the EasyAccess 2.0 service, the HMI must go online in order to receive this piece of information.
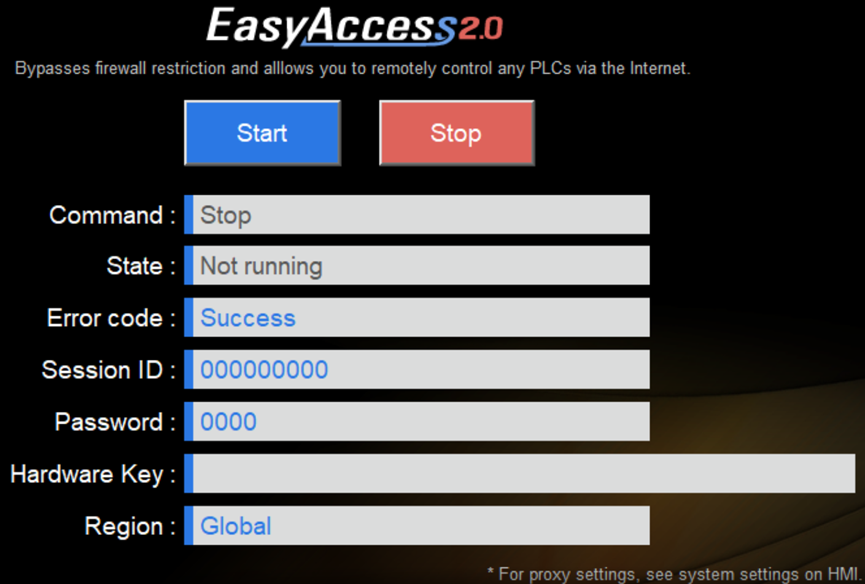
- First, create and download an EasyBuilder project that displays Session ID/Password (system registers [LW-10821] to [LW-10827]), and allows setting LW-10820, the connection control register.
The above setup has been made available in a demo project and the template files (Page 76). - Let HMI go online by setting [LW-10820] to 1.
- Once successfully connected, the HMI will display the Session ID/Password.
Demo Project showing Session ID/Password
Note: Using EasyWatch, it is also possible to find out the Session ID/Password without actually downloading a project.** EasyWatch allows users to monitor the HMI or the PLC address values via Ethernet from the PC. For its usage, check out related sections in the EasyBuilder Pro User Manual.
Add HMI to Domain by Session ID/Password
Under the [Directory] or [Device] tab, click [Add HMI], select [Add by session id/password] and then enter the Session ID and Password.