Directory
Directory refers to a resource management system that is more than just a simple folder structure; it is a platform for managing different types of resources and their permissions.
Directory Structure
Domain (Root Directory)
The top-level directory for all resources. From the Domain level, administrators have a global view of all subdirectories and resources, facilitating unified management and monitoring. Permissions set at the Domain level can be inherited downwards to subdirectories and resources.
Folders
Important tools for organizing and managing resources. Folders can be nested, creating a multi-level structure known as subdomains. This design allows for finer control and management of resources. The depth of the folder structure is limited to a maximum of 10 levels.
Use case: Each folder can represent a project or team. In a large organization, such a structure can be used to define access permissions for different users or user groups.
Adding a Folder
Click on any folder layer, then on the toolbar or right-click to open the menu and select "Add Folder".
Deleting a Folder
Click on the folder you want to delete, then on the toolbar or right-click to open the menu and select "Delete Folder".
Renaming a Folder
Click on the folder you want to rename, then on the toolbar or right-click to open the menu and select "Rename Folder".
Moving a Folder
Click on the folder you want to move, then on the toolbar or right-click to open the menu and select "Move" and choose the destination folder.
Member
Users assigned to specific folders. Each user can only be a member of one folder, facilitating clear definition of permissions and responsibilities, with their permissions precisely controlled and managed by the folder's administrator based on requirements.
HMI
Managed devices. Each HMI device can only be assigned to a specific folder. Access and control permissions for HMI devices are set by the folder's administrator as needed, ensuring that only authorized users can operate or modify the settings of HMI devices.
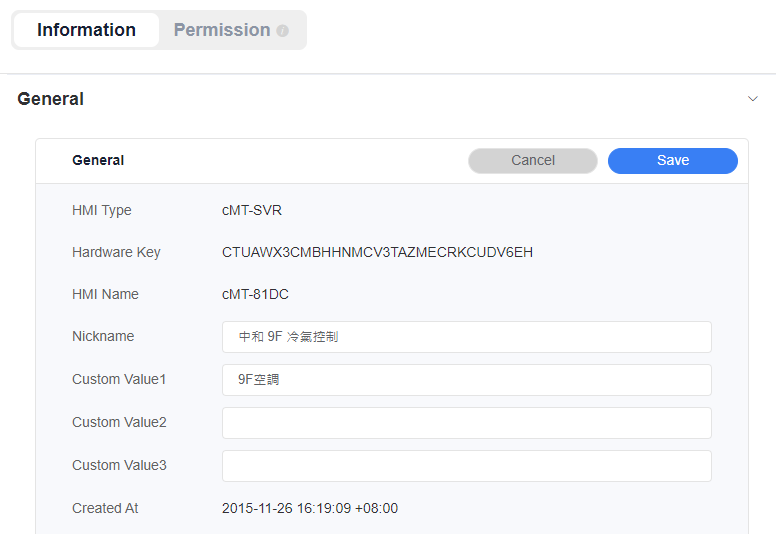
Information
General
- Purpose: Displays information such as HMI Type, Hardware Key, and HMI Name.
- Administrative Operations: Administrators can edit the HMI’s nickname and the content of custom fields.
Removing an HMI from the Domain
Administrators can remove HMI devices no longer needed in the Domain. Below are the steps for removing an HMI:
- Select the HMI: In the Directory page, click on the HMI you want to remove from the Domain.
- Remove the device: In the information field, find and click "Remove device from domain".
- Confirm removal: In the popup alert window, click "Remove" again to confirm the operation.
After completing these steps, the HMI will be removed from the current Domain.
Note: HMIs that only have the Dashboard service activated cannot be removed from the Domain.
Transferring an HMI to Another Domain
Administrators can transfer HMI devices to another Domain. Below are the steps for transferring an HMI to another Domain:
- Select the HMI: In the Directory page, click on the HMI you want to transfer to another Domain.
- Initiate transfer: In the information field, find and click "Transfer to another Domain".
- Fill in the new Domain: Fill in the name of the new Domain in the popup alert window.
- Submit transfer request: After confirming the information is correct, click "Transfer" again to submit the transfer request.
- Wait for approval: The administrator of the new Domain needs to approve the transfer request. Once approved, the HMI will be transferred to the new Domain.
Note: Ensure to communicate with the administrator of the new Domain and obtain their consent before initiating the transfer request to ensure a smooth transfer process.
EasyAccess 2.0
- Information: Shows the Activation Status of EasyAccess 2.0, Public IP, Private IP, Project Name, and Network Traffic (unit: byte).
- Administrative Operations: Users with EasyAccess 2.0 management permissions can activate EasyAccess 2.0 or enable a 30-day trial, as well as view event logs in the HMI project.
Dashboard
Information: Displays the status of Dashboard activation, tag usage, activation card information, EasyBuilder Pro project settings, and geographical data.
Administrative Operations: Users with Dashboard management permissions can initiate a Dashboard trial, add an activation card, and adjust the HMI's latitude and longitude. Geographical data can be set manually or automatically synchronized through data source tags.
Trial Period: Each HMI is eligible for a one-time Dashboard trial with a period of 90 days.
Activation Benefits: Users with dashboard management permissions can add activation cards here. If the HMI is activated through EasyAccess 2.0, it allows for the use of 20 tags for Dashboard functions. Using the Dashboard Activation Card increases the available number of tags to 100, including 20 historical tags. Additionally, Tag Expansion Cards can be purchased, with each card expanding the HMI by 50 tags, including 10 historical tags.
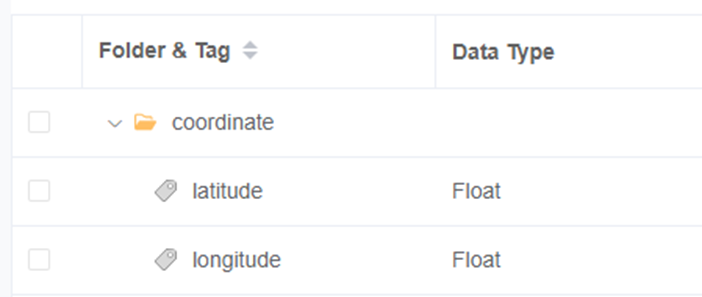
Automatic geographical location synchronization setup:
- In the HMI's data source, select the option to add a new folder.
- Name the new folder "coordinate".
- Within the "coordinate" folder, add two new tags.
- Name the first tag "latitude".
- Name the second tag "longitude".
- Please make sure that the names of the data source labels are case sensitive and can only be ‘coordinate/latitude’ and ‘coordinate/longitude’ in English.
- In the EasyBuilder Pro project, confirm that the "latitude" and "longitude" tags are correctly linked to their respective data sources.
- Set the tag values so that they can synchronize data from the connected data source.
WebConnect
- Feature Introduction: WebConnect is a Web-based service built on EasyAccess 2.0. Users can utilize WebConnect to access HMIs that support EasyWeb or Webview, synchronize viewing of HMI screens via VNC, or customize Web services.
Group
A method of grouping HMIs together for permission management purposes. For new users, using groups is not recommended. Instead, adopting a more modern folder structure for managing resources and permissions is suggested. This is because folder structures offer greater flexibility and finer control, making them more suitable for meeting the requirements of complex organizations.
Directory Tree Example
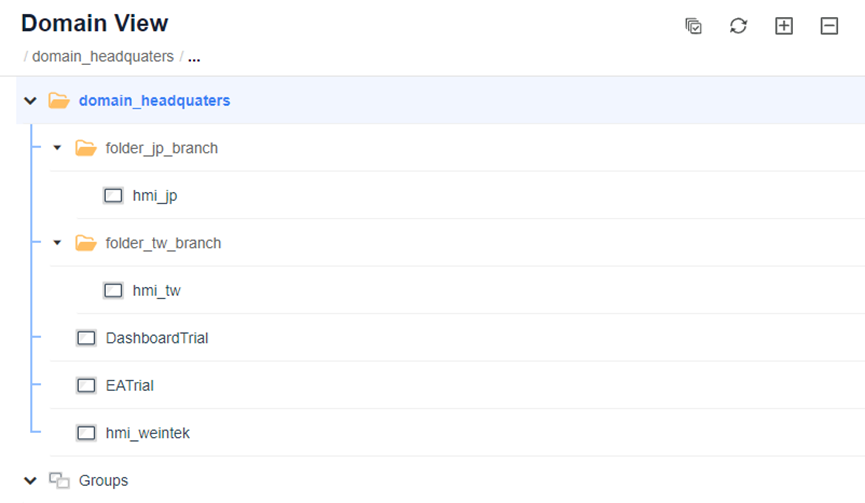
Domain_headquaters (Root Domain)
├─ folder_tw_branch (Subdomain)
│  ├─ hmi_tw
│  └─ member_tw
├─ folder_jp_branch (Subdomain)
│  ├─ hmi_jp
│  └─ member_jp
├─ hmi_weintek
├─ Users under Domain_headquaters
└─ Groups (Compatibility with legacy system)
User Roles and Permissions
Admin/Superuser
- Has full control over the Domain (Root Directory).
- Can allocate resources and permissions.
- Adjusts member permissions based on organizational policies and security requirements to ensure the protection and proper usage of folder resources.
Subdomain Administrator (Subdomain Superuser)
- Manages specific folders and their subfolders.
- Permissions are similar to those of an administrator but are limited to specific folders and their contents.
- Can adjust member permissions based on organizational policies and security requirements.
User
- A general role whose permissions can vary based on administrator configuration.
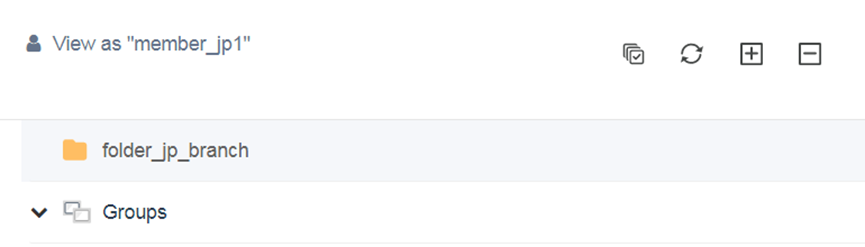
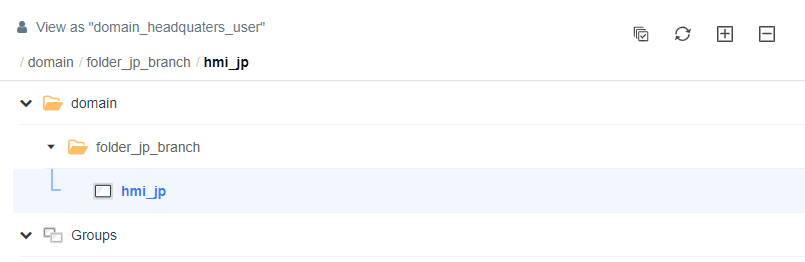
User Perspective Simulation
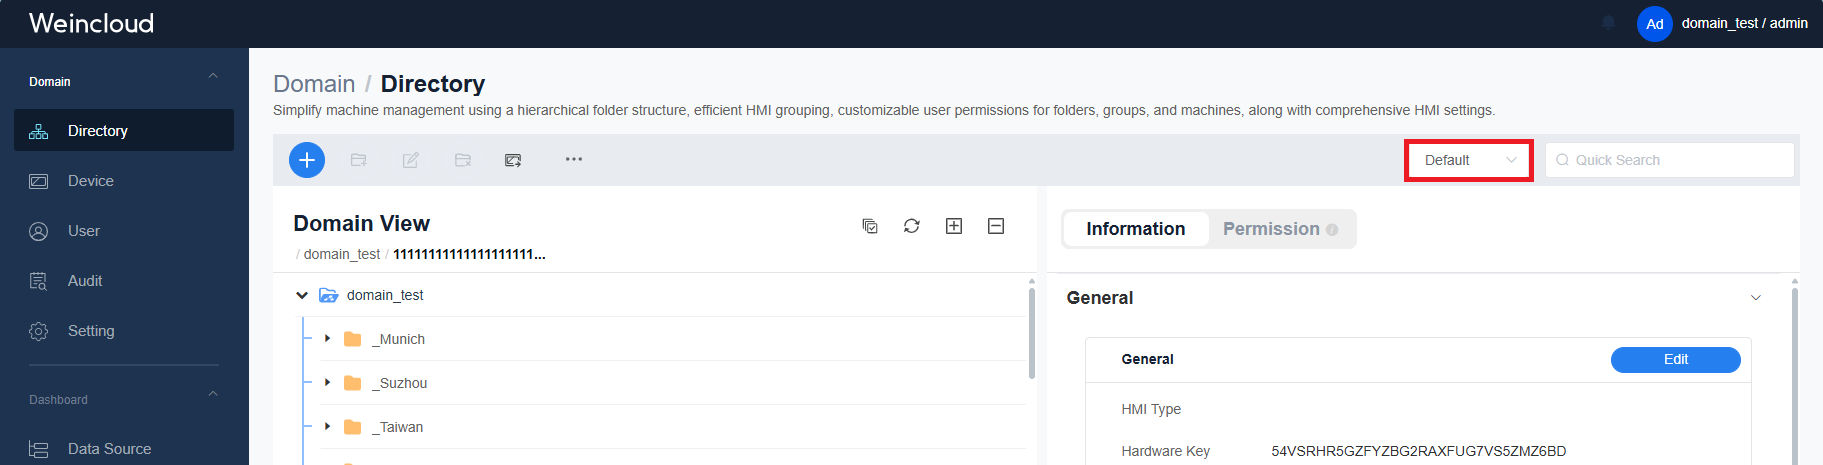
In the Directory interface, administrators can find an option in the top right corner which allows them to view the system from the perspective of a specific user. This means that administrators can see all the folders and HMI devices that the user has permission to access, thereby gaining a better understanding of the user's scope of permissions.
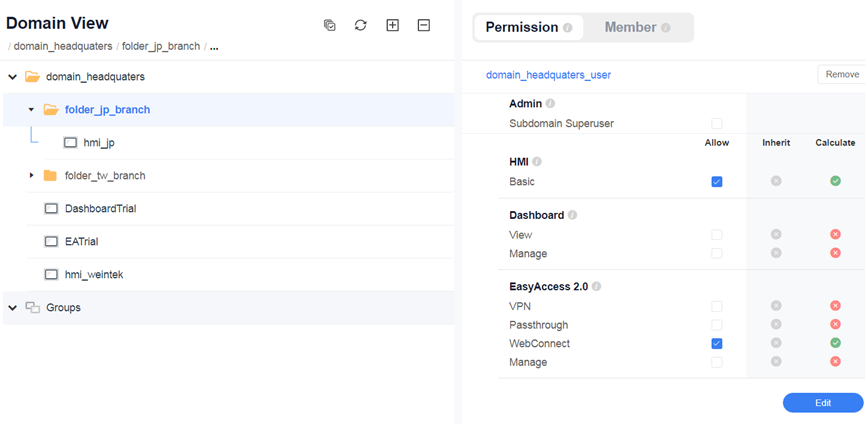
Permission Explanation
Folder Permission Settings
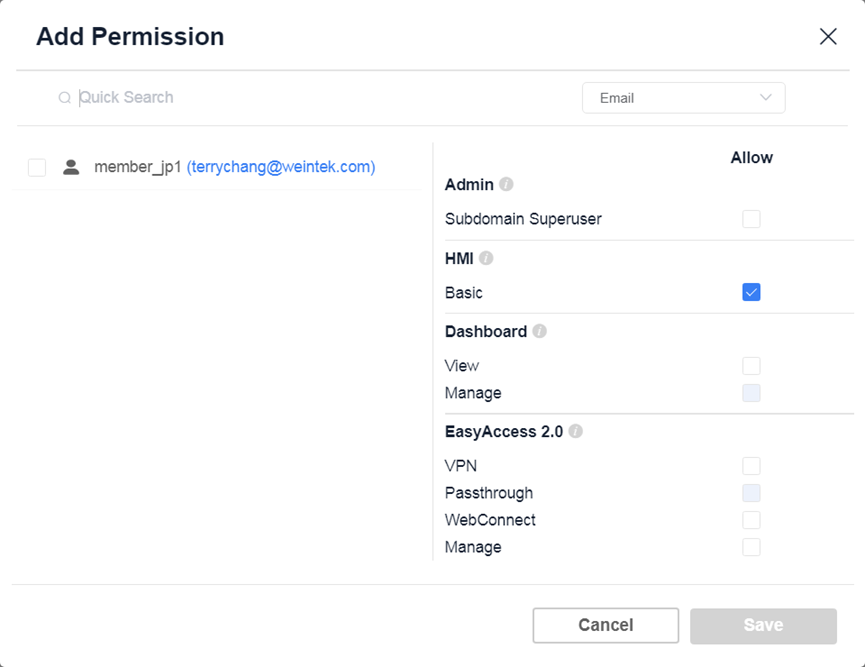
- Subdomain Superuser: Grants users’ full management rights over specific folders.
- HMI-Basic: Users can view basic information of HMIs within folders.
- Dashboard-View: Users can view dashboard information of HMIs within folders.
- Dashboard-Manage: Users can manage dashboard information of HMIs within folders.
- EasyAccess 2.0-VPN: Users can establish VPN connections with HMIs within folders using the EasyAccess 2.0 app.
- EasyAccess 2.0-Pass-through: Users can use the pass-through feature of HMIs within folders using the EasyAccess 2.0 app.
- EasyAccess 2.0-WebConnect: Users can use the WebConnect feature of HMIs within folders in Weincloud.
- EasyAccess 2.0-Manage: Users have full EasyAccess 2.0 functionality for HMIs under the folder.
Individual HMI Permission Settings
- HMI: Basic: Users can view basic information of HMIs.
- Dashboard: View: Users can view dashboard information of HMIs.
- Dashboard: Manage: Users can manage dashboard information of HMIs.
- EasyAccess 2.0: VPN: Users can establish VPN connections with HMIs using the EasyAccess 2.0 app.
- EasyAccess 2.0: Pass-through: Users can use the pass-through feature of HMIs using the EasyAccess 2.0 app.
- EasyAccess 2.0: WebConnect: Users can use the WebConnect feature of HMIs in Weincloud.
- EasyAccess 2.0: Manage: Users have full EasyAccess 2.0 functionality for HMIs.
Inherited permissions
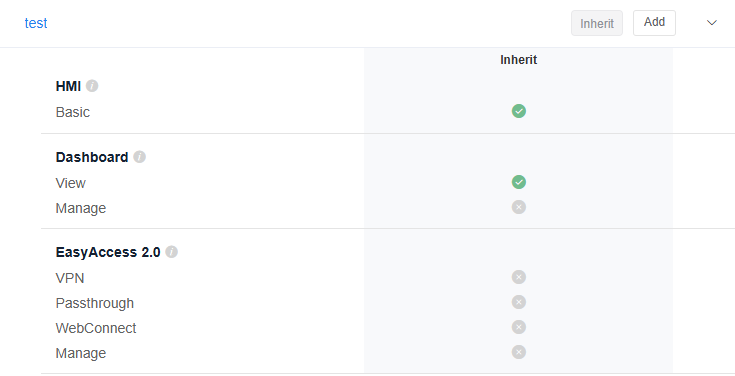
When an administrator sets permissions for a folder or user, these permissions are automatically inherited by all subfolders and HMI devices within that folder. Inherited permissions can be supplemented with additional permissions but cannot be revoked. For example, if user [User1] is granted [Dashboard View] permission for [Folder1], that user will have [Dashboard View] permission for all subfolders and HMIs within [Folder1], and this permission cannot be revoked. This ensures consistency and ease of management for permissions.
Permission Setting Examples
Directory Tree Example
Domain_headquaters (Root Domain)
├─ folder_tw_branch (Subdomain)
│  ├─ hmi_tw
│  └─ member_tw
├─ folder_jp_branch (Subdomain)
│  ├─ hmi_jp
│  └─ member_jp
├─ hmi_weintek
├─ Users under Domain_headquaters
Folder Member Permission Restrictions:
- Upon logging in, member_jp can only see their respective folder and HMI.
- Superusers or Admins of the root domain cannot grant resources from other folders to member_jp; they can only be granted permissions for folder_jp and hmi_jp.
- If HMI: Basic permission is not set, member_jp will not be able to see any resources upon login.
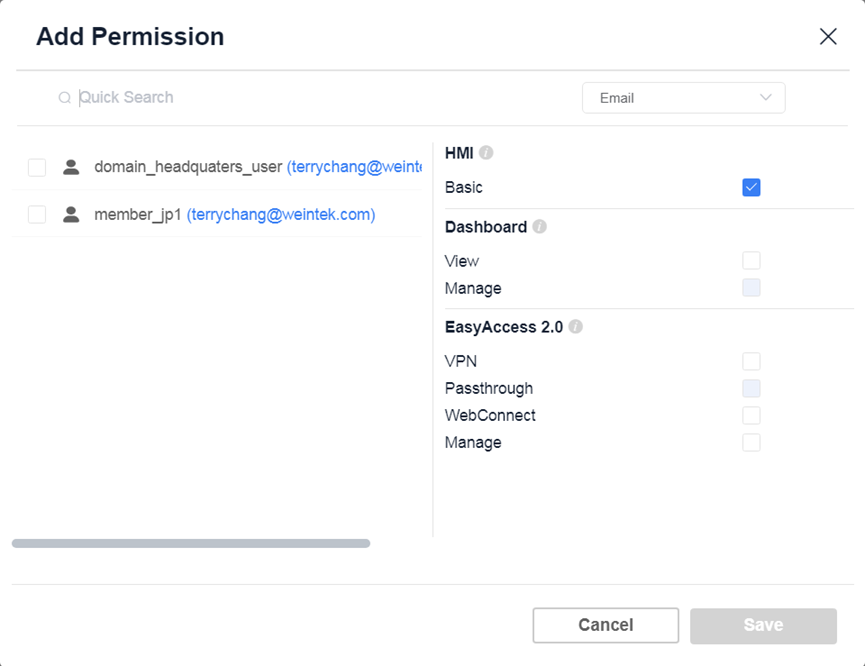
User Permission Allocation:
- Users under Domain_headquaters are not assigned to any folders but are granted EasyAccess 2.0: WebConnect permission for folder_jp. This user can use the WebConnect functionality of all HMIs under folder_jp.
- Users under Domain_headquaters are not assigned to any folders but are granted EasyAccess 2.0: WebConnect permission for folder_jp. This user can use the WebConnect functionality of all HMIs under folder_jp.
Add HMI to Domain
Adding a new HMI device to the Domain. You can choose to activate the following two services:
- EasyAccess 2.0 Service: A remote access service that allows you to connect to and control your HMI devices from anywhere via the internet.
- Dashboard Service: Provides a visual interface for monitoring and displaying data and performance indicators of HMI devices.